Authorize Access to Your Records (FERPA)
As a student, you have the option to release/disclose your student record information to a designated person (e.g. parent or legal guardian). To do so, you may access the MySJSU portal to complete an Authorization to Release form for the designee(s).
This guide provides the steps for you to give your designated person permission to have your information disclosed from your records (academic, financial aid, financial accounts, and housing). Go to Family Educational Rights and Privacy Act (FERPA) to learn more about how SJSU protects the privacy of your student records.
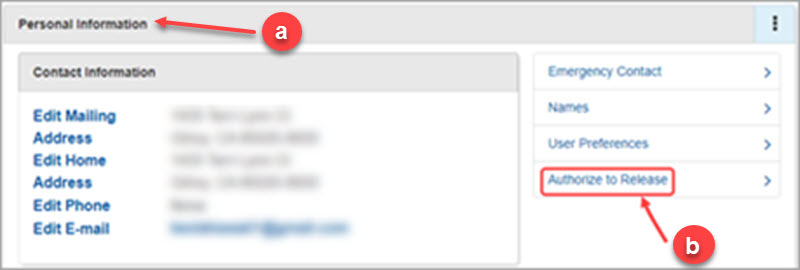
1. Log in to MySJSU.
-
- Go to the Personal Information section.
- Click the Authorize to Release link.
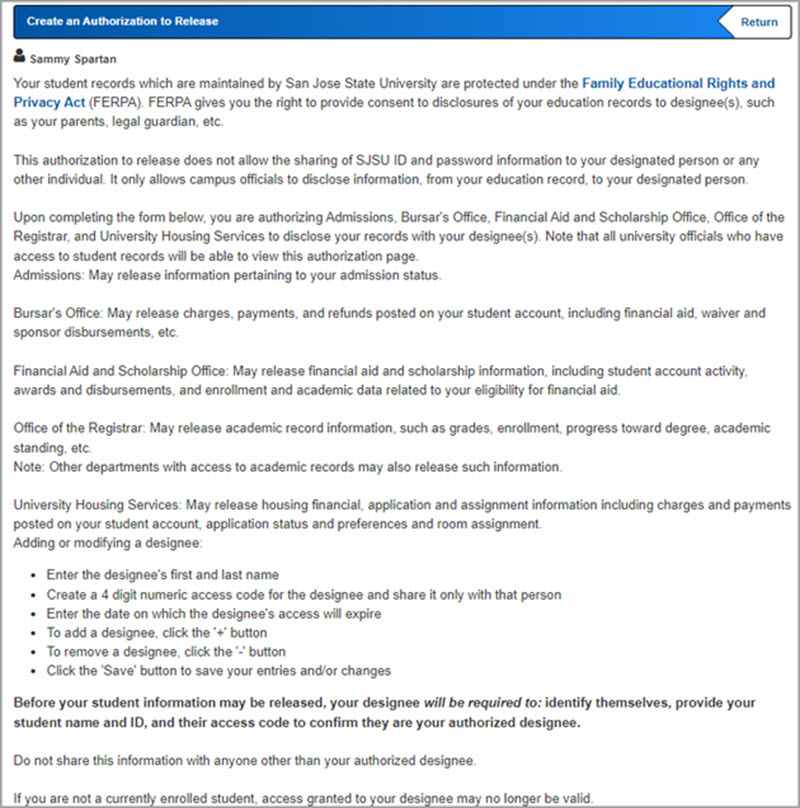
2. Please read the information on the page to understand the following:
-
- Types of records you can choose to disclose.
- Who has access to view the authorization.
- Who is authorized to disclose to your designee.
- How to add or modify your designee.
- Information required from your designee to verify authorization.
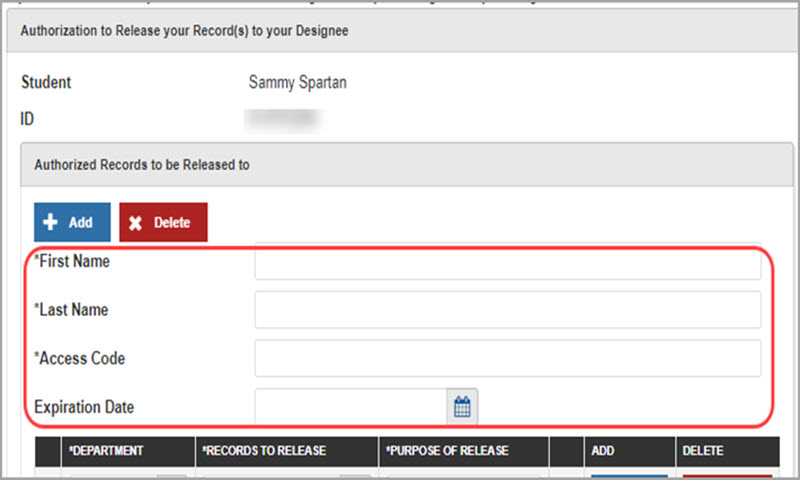
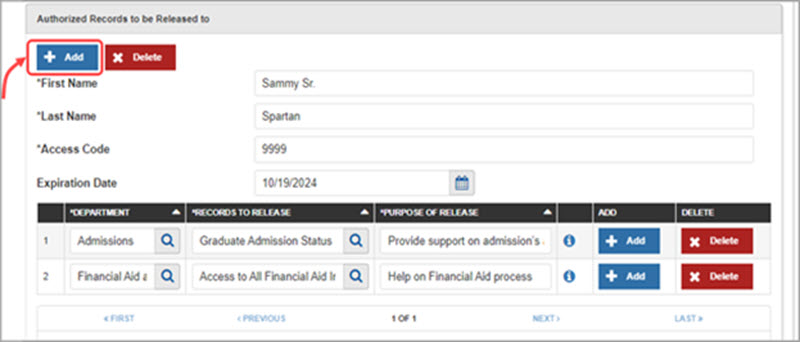
3. To add your first designee:
-
- Enter the designee's First and Last name.
- Create a 4-digit access code without leading zeros for the designee and share it only with that person.
- Enter the date on which the designee's access will expire.
-
- You can enter a minimum of 1 day and a maximum of 365 days from date of entry.
- You can return to this page to shorten or extend the access period at any time.
-
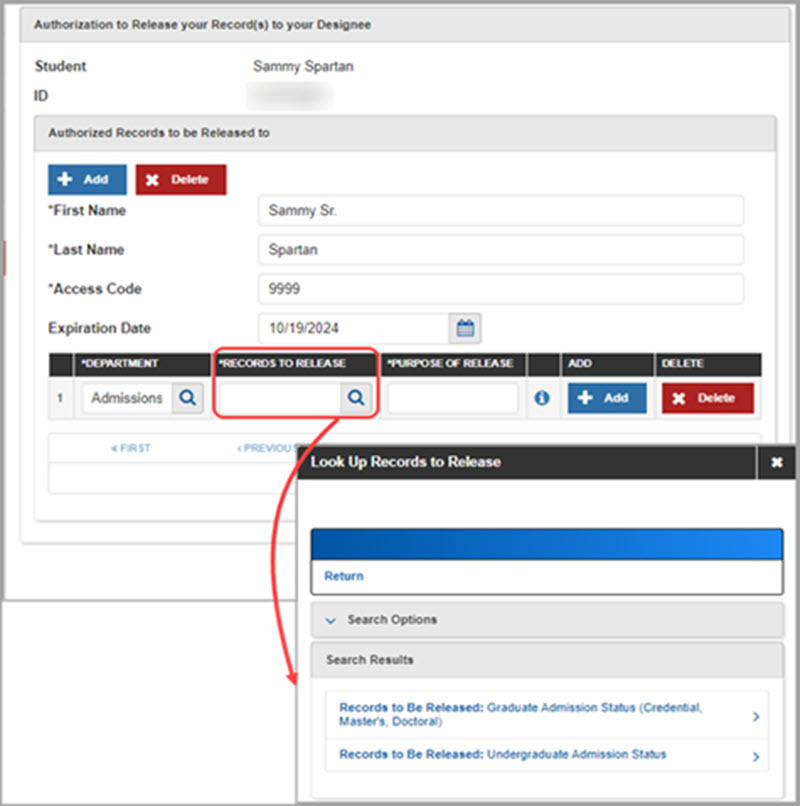
4. Click the search icon to select the Department of the record you wish to authorize. You have the option of selecting the following:
-
- Admissions
- Bursar’s Office
- Financial Aid and Scholarship Office
- Office of the Registrar
- University Housing Services

5. Click the search icon to select the Records to Release.
-
- Each department will have different types of records you may select to release to your designee.
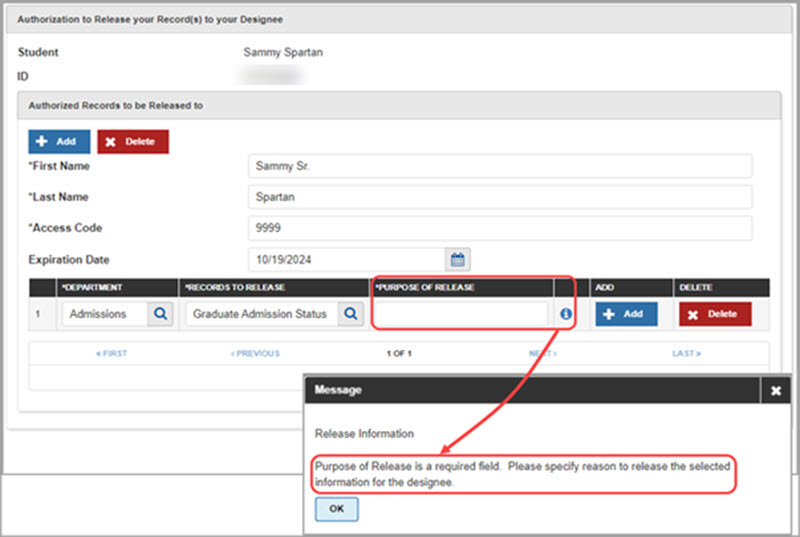
6. In the Purpose of Release, enter the purpose/ reason of the release for this designee. This is a required free text field.
For example: Provide support on admission’s application process.
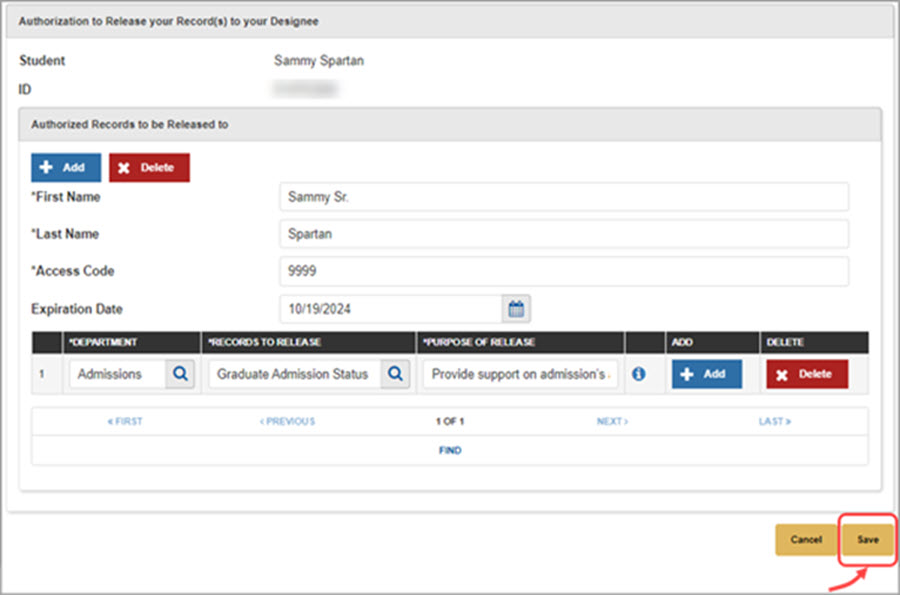
7. Click the Save button at any time when you are finished.
Adding more authorized records.
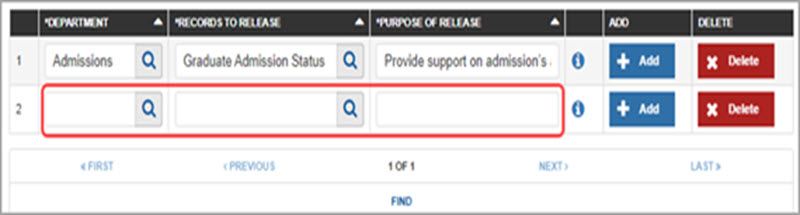
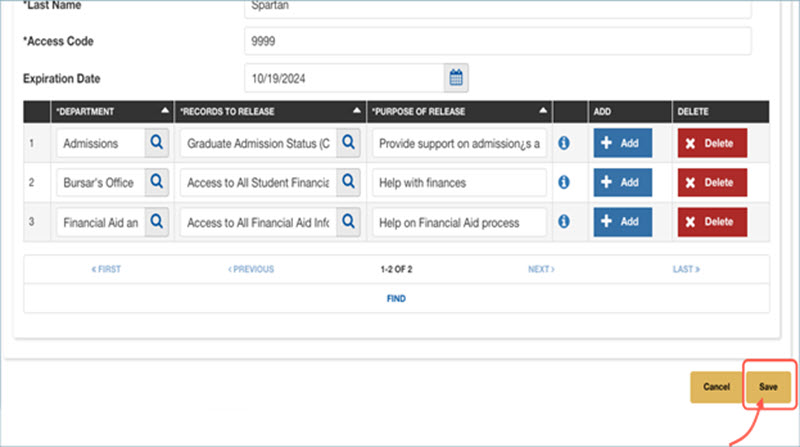
8. To add more department records to release to the same designee, click the Add button.
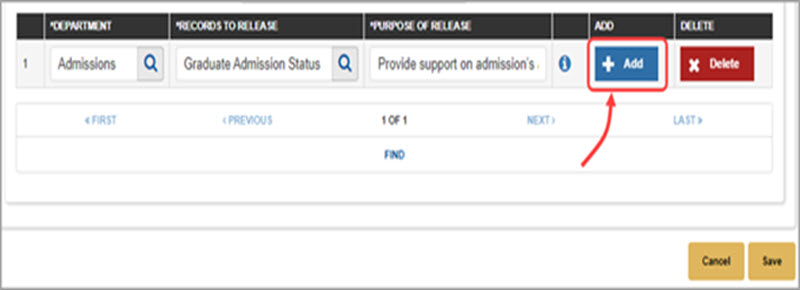
9. Select the Department and Records to Release. Fill in the Purpose of Release.
Adding more designees.
10. To add another designee, click the Add button (plus icon) next to the Expiration Date.
11. Enter designee information:
-
- Enter designee's First and Last name.
- Create a 4 digit access code without leading zeros for the designee and share it only with that person.
- Enter the date on which the designee's access will expire.
-
-
-
- You can enter a minimum of 1 day and a maximum of 365 days from date of entry.
- You can return to this page to shorten or extend the access period.
-
-
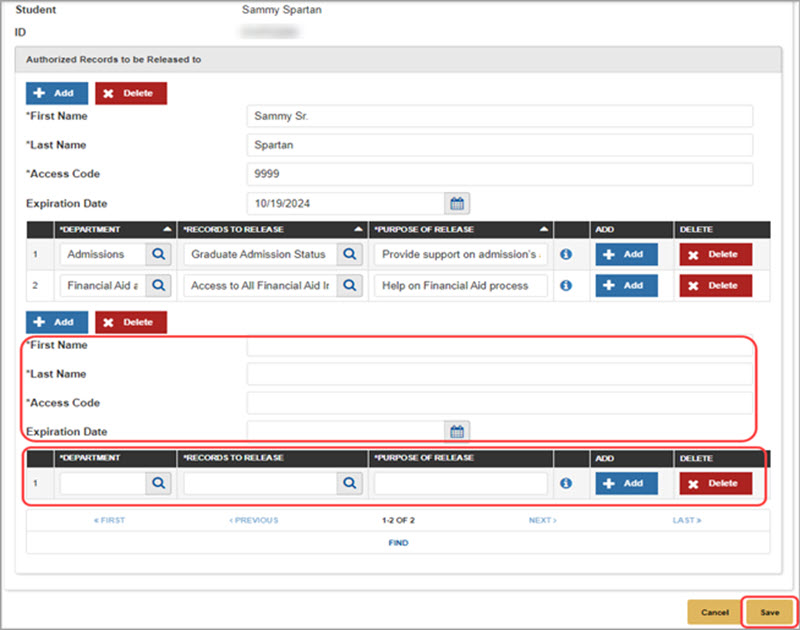
12. Add authorized records to be released for the designee.
-
- Select the Department and Records to Release. Fill in the Purpose of Release.
13. Click the Save button once you are done adding designees and the records to be released.
Modifying Designee(s).
14. To make changes:
-
- To completely remove a designee, click the Delete button right above the designee’s name you want to remove.
- To change the expiration date for a designee, locate the designee row and click the calendar icon. Select a different Expiration Date for the designee.
- To remove an authorized record from the designee, locate the row and click the Delete button.

15. Click the Save button when you have finished adding/modifying designee(s) and the authorized records to be released for the designee(s)
16. To exit out of the Authorization to Release page, click the Return button at the top right of the page.

17. You have successfully completed adding/modifying your authorization to release for your designee(s).